
Say your new collection launches at a trade show next month, and the sample book maker you ask quotes a 300-copy minimum. You haven't decided whether the book is for designers, for dealers or for your sales reps to carry, and the sample sizes may still change once more. Paying for several hundred copies at this point locks in the result before you've tested anything.
You don't need to take that bet on your first sample book. Start with one physical prototype, then make 5 copies for a trade show, for designers and for clients who visit your showroom. Once the format works and orders pick up, move to 50 or 500. Many of the small batch sample books we make grow exactly this way, and the first few copies look and feel the same in hand as the hundreds that follow.
Why sample book minimums run into the hundreds
In a large run, the slots that hold your samples are punched out in one stroke with a cutting die. The die is made separately for each design, and it only pays off when its cost is spread across hundreds of books. That is why many sample book makers set minimums between 250 and 1,000 sets. It makes sense for the factory. For a brand making its first book, it means ordering hundreds of copies of a design nobody has used yet.
A few copies: a digital cutter instead of a cutting die
For small runs, we don't make a cutting die. Slot depth starts with your samples. If your samples are 1 mm (about 0.04 in) thick, the top layer of the page is two sheets of 0.5 mm (about 0.02 in) white card, one printed and one blank. We cut the slots in each sheet on a digital cutter, line them up by hand and laminate them together, which gives a slot exactly 1 mm deep. That pair is then laminated onto a third sheet of white card with no slots, which forms the floor of each slot and holds your samples. All three sheets are white card because it is rigid; coated paper is too soft to keep its shape. Hand lamination may sound rough, but the slots line up precisely.
For larger runs, we laminate the two top sheets whole, punch every slot in one stroke with a cutting die on a die-cutting press, and then laminate the result onto the base card in the same way. It saves time and labor. Both methods give the same slot size and the same finished page; only the machine changes. Makers of digital cutters list short runs and not having to wait for a die among the main reasons to use them (Kongsberg).
 kongsbergsystems.com
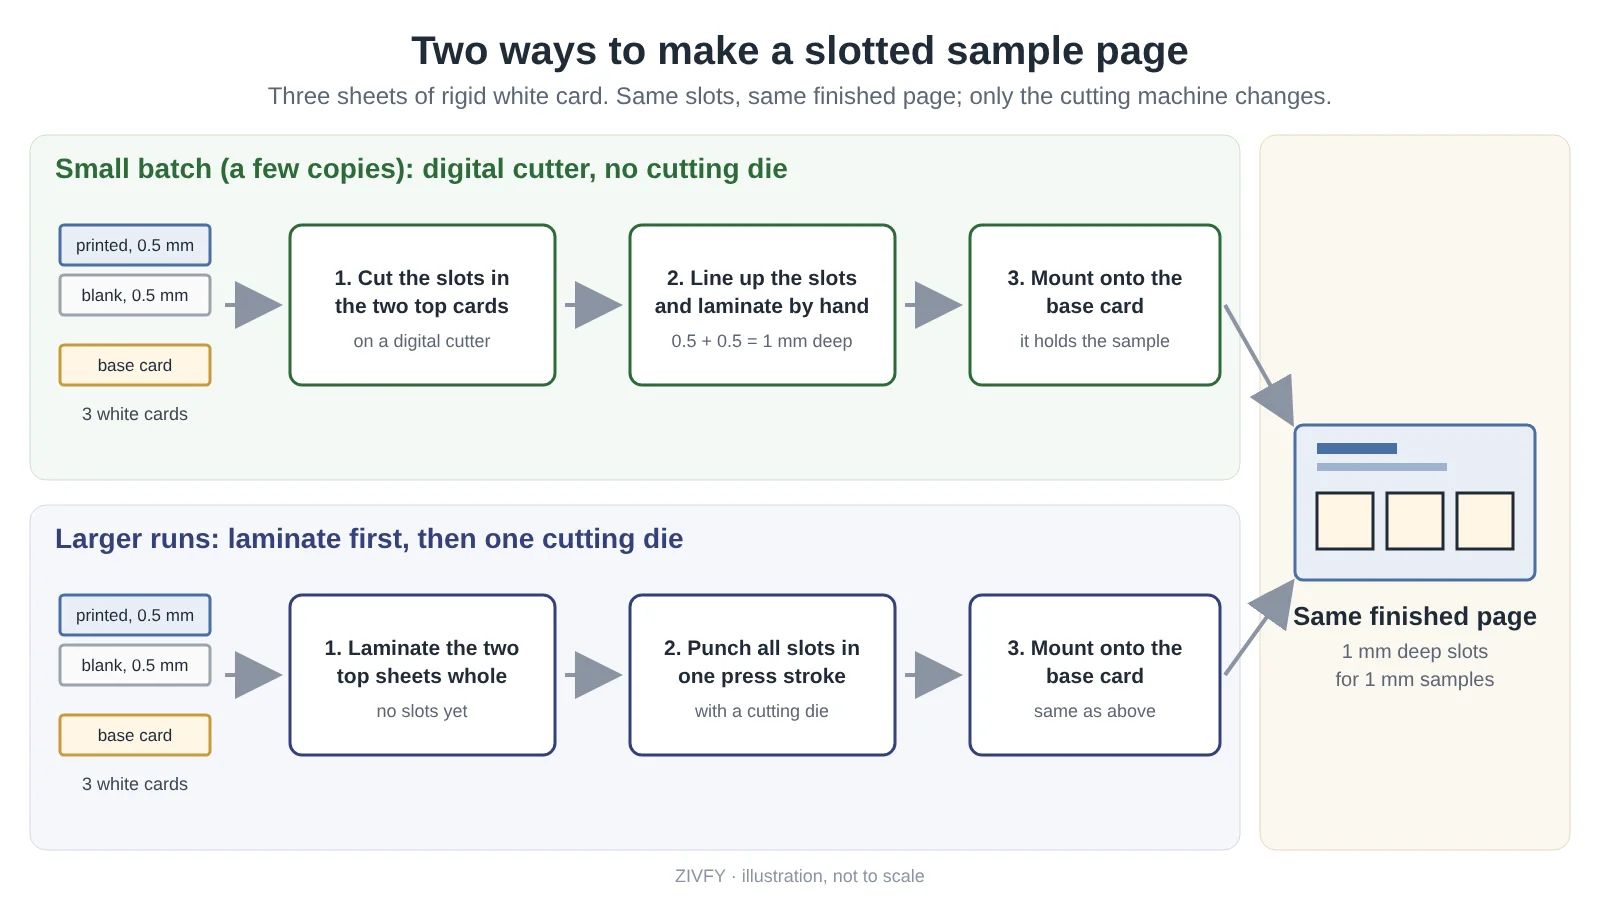
So a small batch isn't a cut-down version. Until a run is big enough to justify a die, we use a different machine.
Slotted pages are only one example. If you're making a fold-out, the fold lines in the greyboard are cut on a V-groove machine, which never needs a cutting die at any quantity. Samples that are flat-mounted on the page don't need a die either. Whichever format you choose, your first few copies won't carry a tooling charge.
Make one prototype first and test it with your own samples
Once you approve the design drawing, we make one physical prototype, quoted separately. Load your own samples into it and check whether the slots hold them firmly, whether the pages turn easily, how thick the book is when closed and how heavy it is to carry. This one copy shows all of it. Most clients come to us wanting to try first, and they order the rest once the prototype passes.
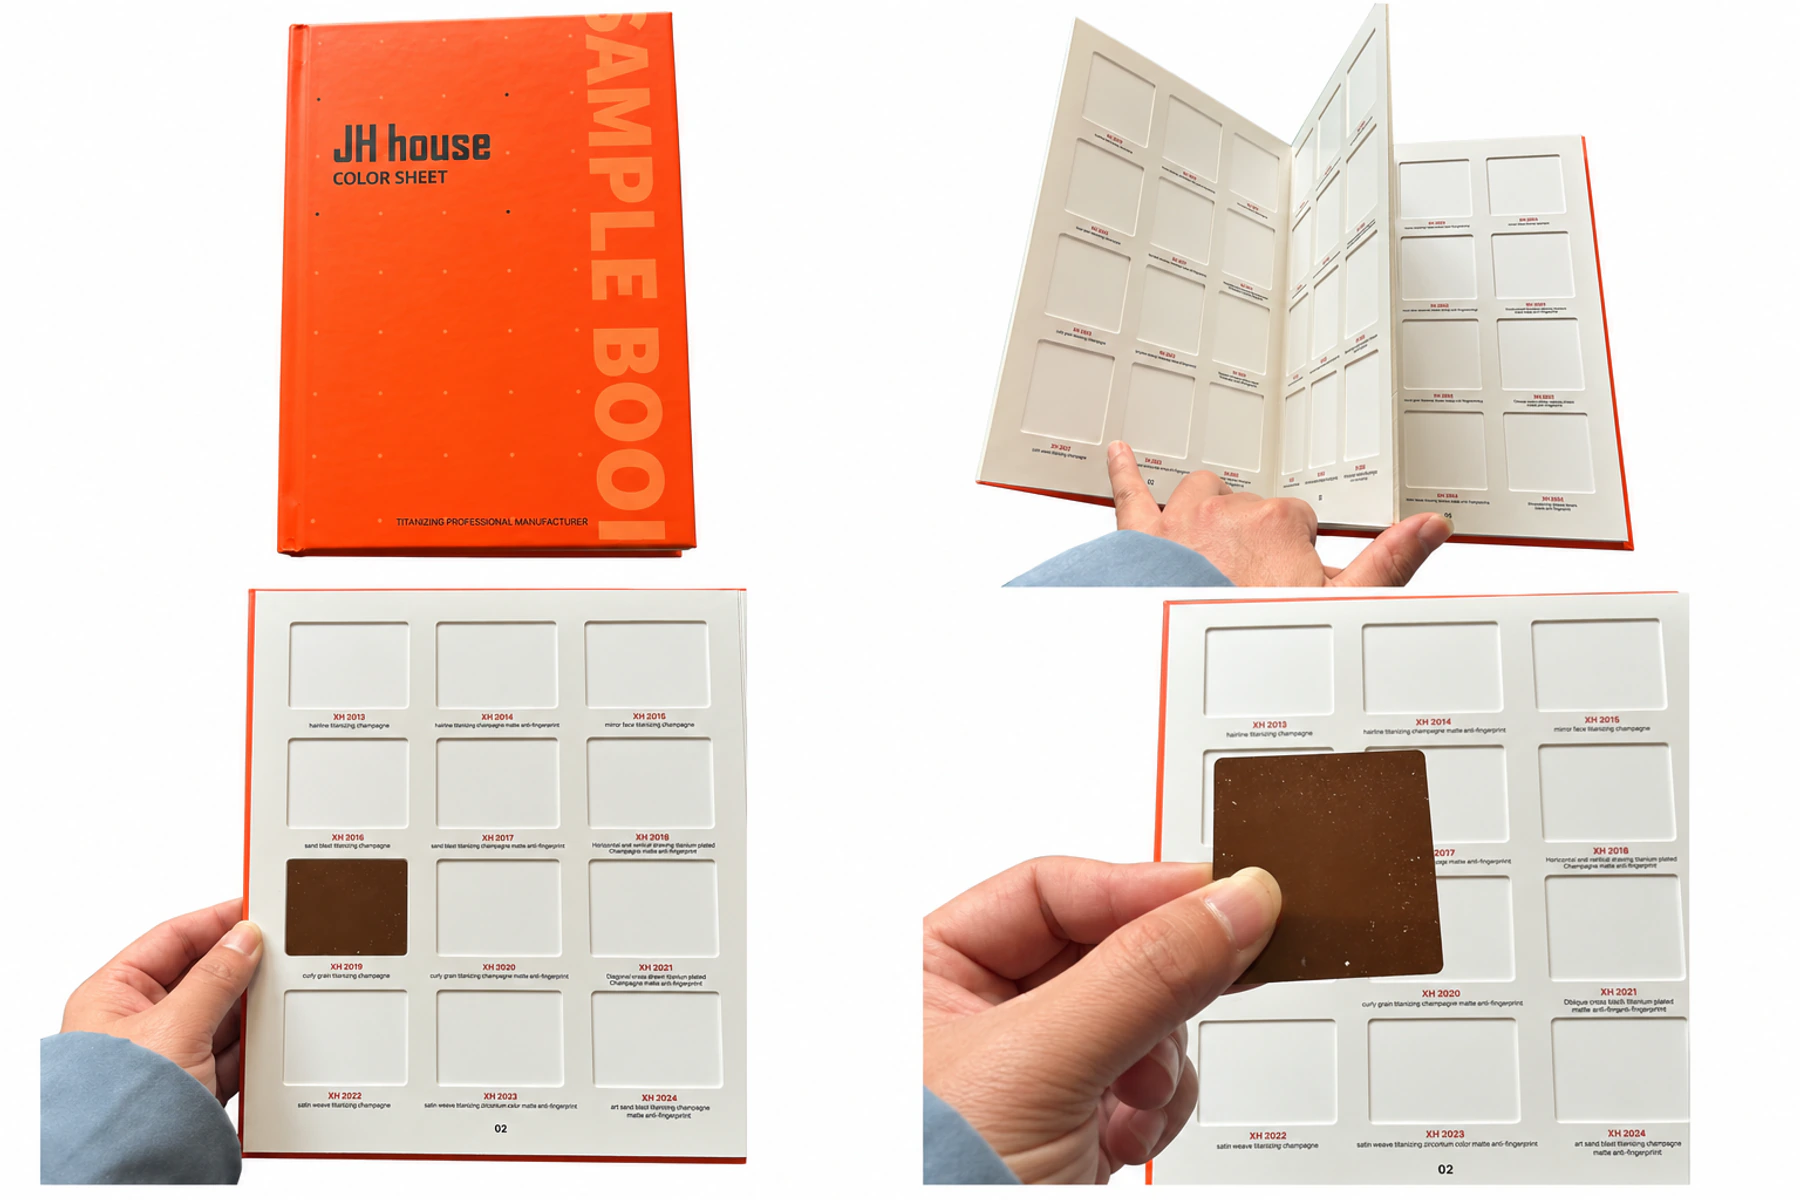
This is the cheapest point to make changes, because you're changing one book, not several hundred. It's also the right moment to settle the format: a page-turning swatch book or a sample binder where pages can be added or removed.
Put the first 5 copies where they show results
Those 5 copies usually go to three places: a trade show stand where visitors flip through them, your showroom when clients visit, and designers' offices.
Who holds the book decides how it should be made. Designers tend to keep it on a shelf and wait for a brand rep to come by and update it; many US interior design studios organize their samples by brand and type so reps can refresh them easily (Business of Home). Dealer copies often go to a master distributor, who passes them on to sub-dealers. Sales reps carry theirs, so weight matters most. A single stainless steel chip is light, but a dozen or so add up quickly, so we usually suggest cutting them smaller: 4 × 4 cm (about 1.6 × 1.6 in) or 5 × 5 cm (about 2 × 2 in) is enough to show the finish.
 businessofhome.com
Five copies are enough to see which use works best and where the next batch should go.
Scaling up changes the machine, not the book
Going from 5 copies to 50, the method stays the same and the lead time grows by only two or three days. For bigger runs we switch to a cutting die, and as shown above, the finished pages look the same. We keep your design files, so a reorder doesn't mean preparing everything again.
Many clients come back to order more. Some have grown their business; others have decided to send more sales reps out and need a copy for each one. When your collection changes later, here's how to update a sample book page by page.
The one thing to settle first: who sets the sample size
The slots are cut to fit your samples, and there are only two ways this goes:
- Your samples aren't cut yet: we set the slot size, and you cut your samples to match.
- Your samples are already cut: we cut the slots to their size and thickness. Most clients are in this group.
Either way, send us the actual size and thickness before we cut the slots. We usually ship the books empty and you load the samples yourself, so when the sizes match, loading them is straightforward. For how we handle layout and design drawings, see sample book printing.
Next step
Tell us your sample size, thickness, roughly how many samples and who the book is for. We'll suggest a format and send a design drawing. When the prototype arrives, load your own samples and try it. If it works, make 5 copies for your trade show and your designers. When you need 50 before the next show, an email is all it takes (contact us).